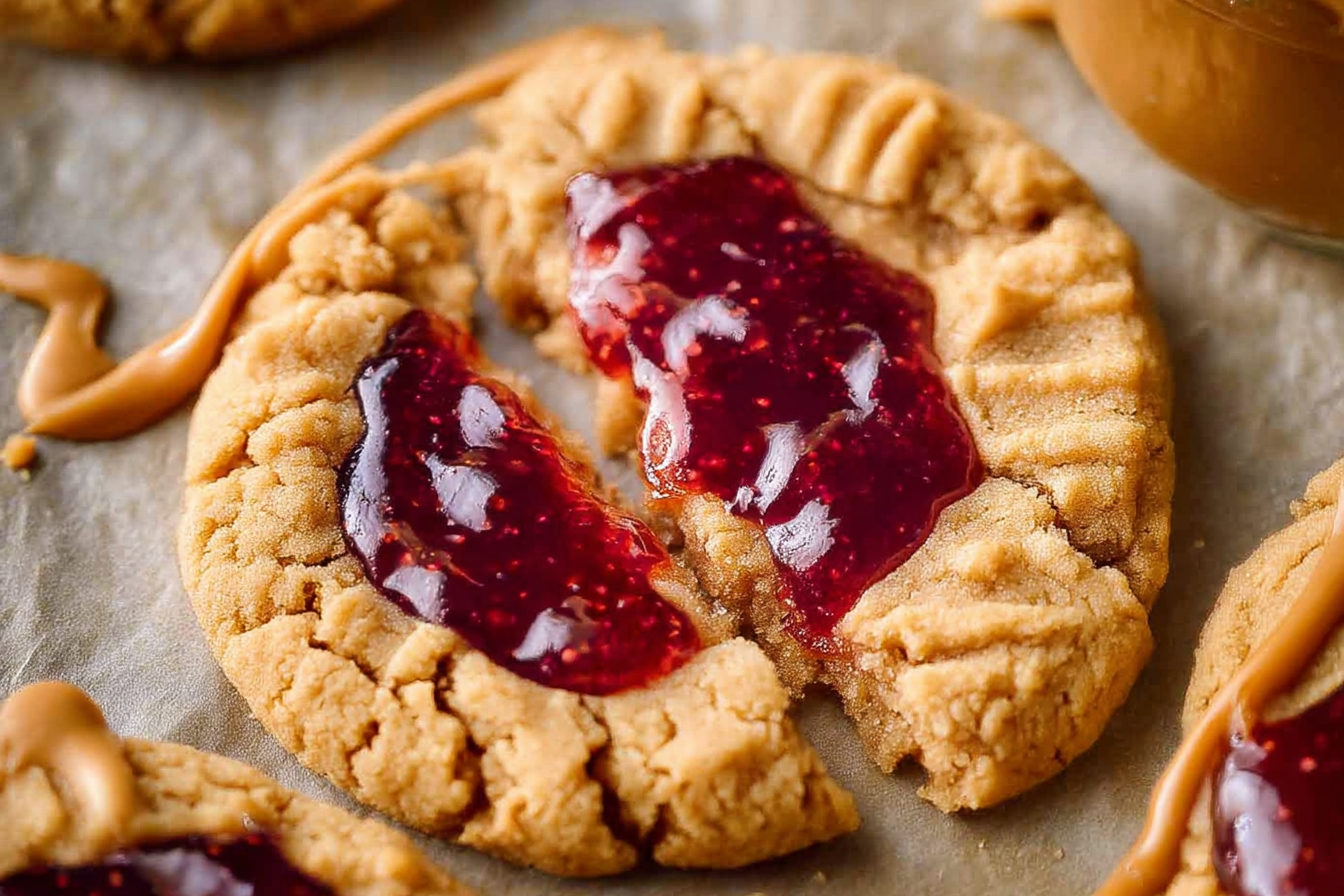
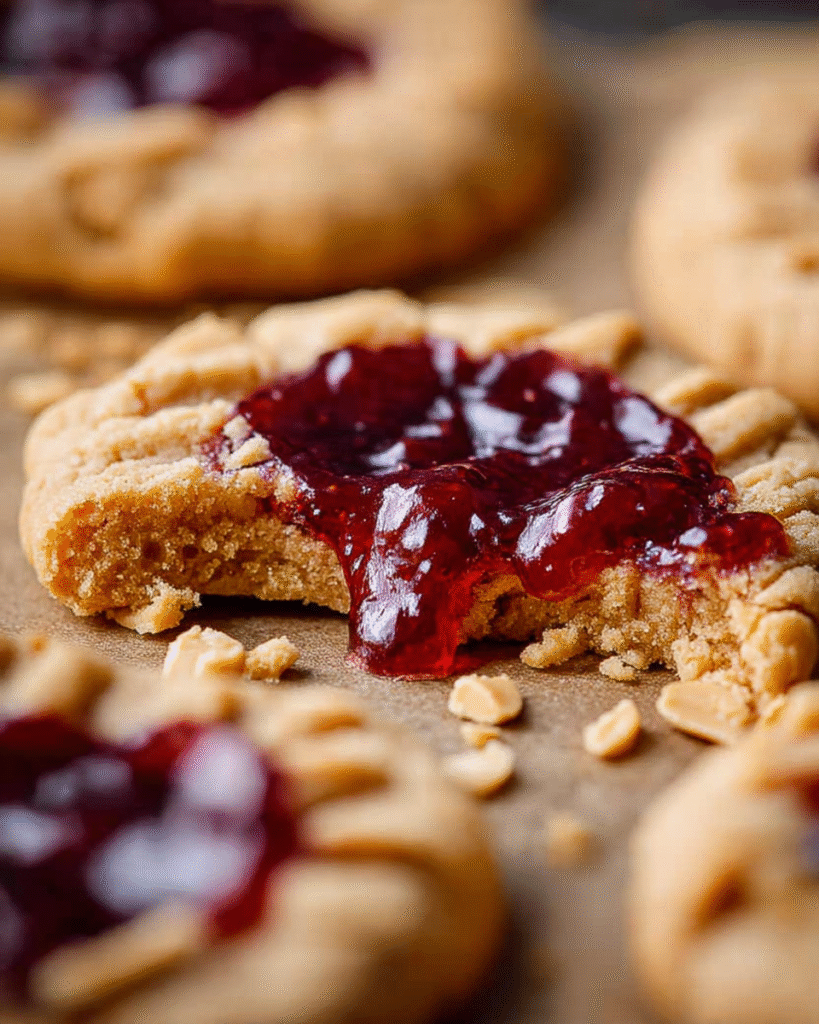
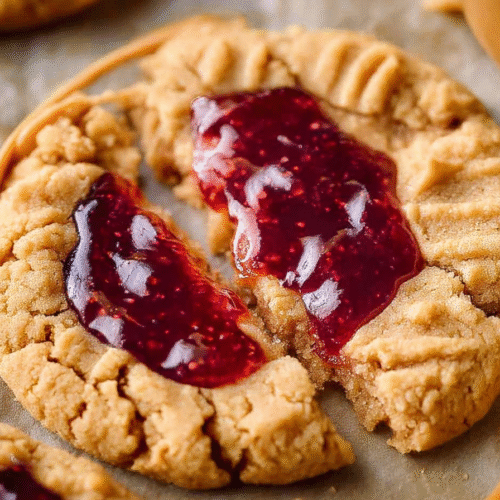
Let’s be real—peanut butter and jelly is one of those classic combos that never goes out of style. It’s sweet, salty, creamy, and fruity all at once. Now imagine taking that beloved sandwich flavor and transforming it into a warm, soft, chewy cookie. Yes, that’s exactly what these Peanut Butter and Jelly Cookies deliver. They’ve got the rich, nutty flavor of peanut butter cookies, with a little well of jam baked right into the center. Each bite is nostalgic, satisfying, and kind of magical.
These cookies are great any time of year, but I especially love baking them on cozy afternoons, for after-school snacks, or when I want to add something playful and crowd-pleasing to a cookie platter. They’re also ridiculously easy to make—no chill time, no special tools, and just a handful of ingredients that you probably already have in your kitchen.
I first made these when I had an almost-empty jar of raspberry jam hanging out in the fridge and a strong cookie craving. I figured why not combine it with peanut butter and turn it into something a little fun? That batch disappeared in about two days, and now it’s a go-to whenever I want something sweet but low-effort. Every time I make them, someone asks for the recipe.
Why You’ll Love This Recipe
These cookies come together quickly and taste like childhood in the best way
They’re soft and chewy with just the right amount of crispy edges
Totally customizable with your favorite jam or jelly
Kid-friendly, but grown-ups love them just as much
No fancy equipment, chilling, or complicated steps—just mix, scoop, and bake
Great for bake sales, holiday trays, or casual snacking
They freeze well, so you can keep a stash on hand for cookie emergencies
Ingredients You’ll Need
Creamy Peanut Butter – Use a no-stir brand for best results. Natural peanut butter tends to make the dough too oily or crumbly, but if you stir it thoroughly, it can work in a pinch
Unsalted Butter – Softened to room temperature so it creams easily with the sugars
Brown Sugar – Adds a rich, molasses-y sweetness and keeps the cookies chewy
Granulated Sugar – For sweetness and a touch of crisp texture
Egg – Helps bind the dough and gives structure
Vanilla Extract – Adds warmth and rounds out the peanut flavor
All-Purpose Flour – The foundation of the cookie dough
Baking Soda – Helps the cookies rise slightly and spread perfectly
Salt – Just a little to balance the sweetness and enhance the peanut flavor
Your Favorite Jam or Jelly – Raspberry, grape, strawberry, blackberry, or even fig if you’re feeling fancy. Thicker jams hold up better during baking
Note: A complete list of ingredients with exact measurements is included in the instructions section below
How to Make It (Step-by-Step Instructions)
Step 1: Preheat your oven and prep your baking sheet
Set your oven to 350°F (175°C) and line a baking sheet with parchment paper or a silicone baking mat. This prevents sticking and helps the cookies bake evenly
Step 2: Cream the peanut butter, butter, and sugars
In a large bowl, use a hand or stand mixer to beat the peanut butter, softened butter, brown sugar, and granulated sugar together until the mixture is light and fluffy. This takes about 2–3 minutes and sets the stage for a soft, chewy cookie
Step 3: Mix in the egg and vanilla
Add the egg and vanilla extract and beat again until everything is smooth and fully combined. Scrape down the sides of the bowl as needed so nothing gets left behind
Step 4: Add the dry ingredients
In a separate bowl, whisk together the flour, baking soda, and salt. Slowly add the dry mixture to the wet ingredients and mix until just combined. Don’t overwork the dough—stop mixing once there are no more flour streaks
Step 5: Scoop and shape the dough
Use a small cookie scoop or spoon to portion out about 1 ½ tablespoons of dough. Roll each portion into a ball and place it on your baking sheet, leaving about 2 inches between each one
Step 6: Make the thumbprint and fill with jam
Use your thumb or the back of a small spoon to gently press a shallow well into the center of each cookie dough ball. Then, spoon about ½ teaspoon of your chosen jam into the center. Be careful not to overfill—just enough to settle into the center without spilling over
Step 7: Bake and cool
Bake the cookies for 10–12 minutes, or until the edges are lightly golden and the centers are just set. The cookies may still look slightly soft in the middle, but that’s what makes them perfect. Let them cool on the baking sheet for 5 minutes, then transfer to a wire rack to cool completely
Helpful Tips
If your jam is very runny, give it a quick stir with a teaspoon of cornstarch to help it stay in place during baking
Use a cookie scoop for even sizing—your cookies will bake more consistently and look extra polished
Let the cookies cool completely before stacking or storing. The jam center stays soft and sticky
Make a big batch and freeze half. Just thaw at room temp whenever you need a sweet fix
Try different flavor combos—peanut butter with apricot preserves, almond butter with blackberry jam, or even Nutella instead of jam for a chocolatey twist
If you want a fancier version, drizzle a little melted white chocolate over the top once the cookies are cooled
Want sandwich-style cookies? Skip the thumbprint and bake the cookies flat, then spread jam between two for a PB&J cookie sandwich
Frequently Asked Questions (FAQs)
Can I make these ahead of time?
Yes! You can make the dough and refrigerate it for up to 48 hours. When ready to bake, let it sit at room temp for 20 minutes to soften slightly
Can I freeze the cookies?
Totally. You can freeze the baked cookies in an airtight container for up to 2 months. You can also freeze the dough balls without jam, then fill and bake as needed
What’s the best jam to use?
Any kind of jam or jelly works, but thicker ones tend to hold up better while baking. Raspberry, strawberry, and grape are the most popular choices
Can I make this gluten-free?
Yes, just use a 1-to-1 gluten-free flour blend instead of all-purpose flour. No other changes needed
Can I use crunchy peanut butter?
Sure! It adds a little texture. Just make sure it’s still a no-stir variety so the dough holds together well
Is this recipe good for kids?
Absolutely. Kids love the fun look and sweet taste, and they’re great little helpers for the thumbprint and jam-filling step
Try These Cookies and Share Your Jam Choice
I bake these Peanut Butter and Jelly Cookies all the time, especially when I want something comforting without a lot of fuss. They remind me of school lunches and lazy weekend mornings, and every time I make them, I find myself sneaking just one more. I usually go for raspberry jam, but I’ve tried everything from blueberry to cherry, and they’re all amazing
Give them a try, pick your favorite jam, and let me know how it turns out. They’re simple, nostalgic, and downright delicious—what’s not to love?
Peanut Butter and Jelly Cookies
Ingredients
- 1 cup smooth peanut butter
- ½ cup light brown sugar
- 1 teaspoon baking soda
- 1 large egg
- ¼ cup raspberry jam
Instructions
- Preheat the oven: Set your oven to 325°F (163°C).
- Mix ingredients: In a medium mixing bowl, combine the peanut butter, brown sugar, baking soda, and egg. Stir until well blended.
- Shape cookies: Roll the dough into 12 balls and place them evenly spaced on a buttered or parchment-lined cookie sheet.
- Indent and fill: Slightly press each cookie down with your index finger to create a small indentation in the center. Fill each indentation with approximately 1 teaspoon of raspberry jam.
- Bake: Bake the cookies for about 15 minutes, or until they are lightly browned.
- Cool: Allow the cookies to cool on the pan for 5 minutes before transferring them to a wire rack to cool completely.
Notes
- Feel free to substitute the raspberry jam with your favorite flavor, such as strawberry or grape.
- For added texture, consider sprinkling chopped peanuts on top before baking.
- Ensure the cookies are completely cooled before storing to maintain their texture.