
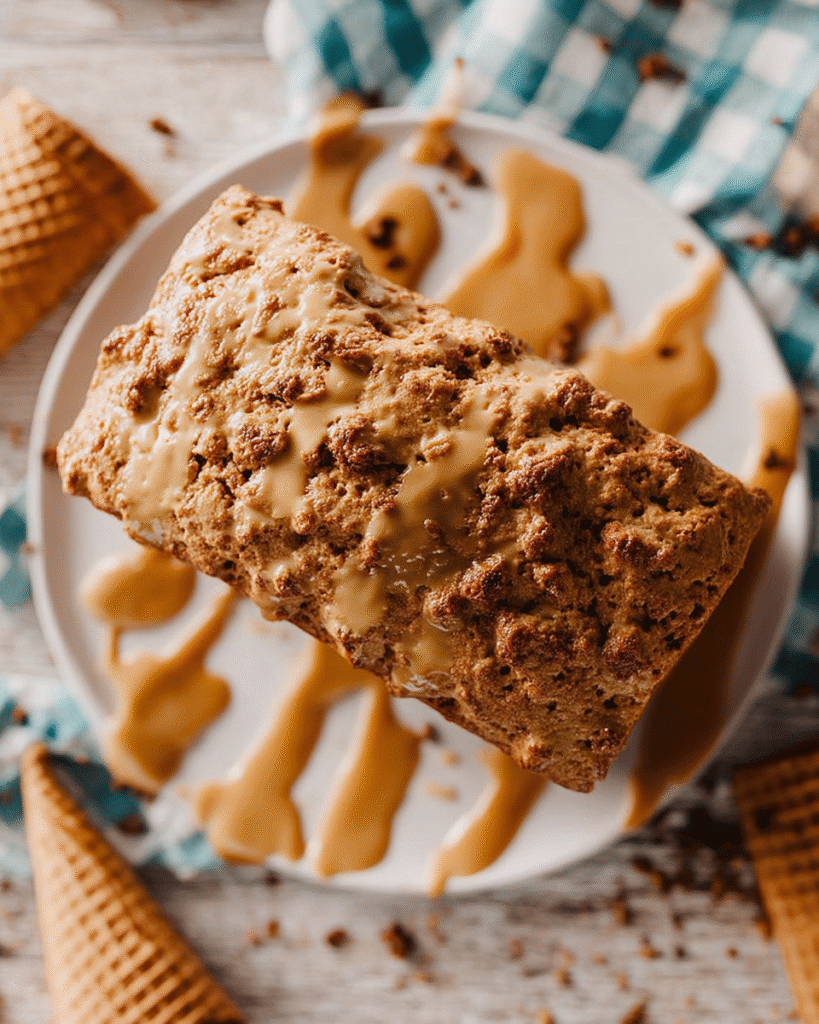
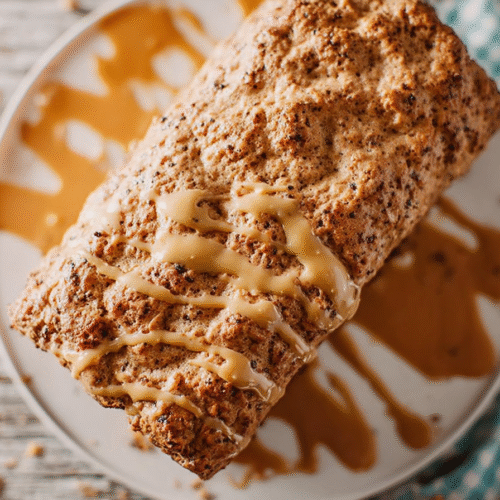
There are some recipes that instantly take you back in time, like a nostalgic trip to your grandma’s kitchen. One such recipe is Vintage Ice Cream Bread, a quirky yet delightful treat that has been around for generations. The beauty of this recipe lies in its simplicity and the magic that happens when you combine just a few basic ingredients—ice cream, self-rising flour, and a pinch of salt. That’s it! No fancy mixers, no intricate techniques—just pure, sweet, and fluffy goodness.
This ice cream bread is one of those recipes that seems almost too easy to be true. Yet, when you bake it, you get a wonderfully soft, subtly sweet loaf that’s perfect for snacking, breakfast, or even dessert. What makes this bread so special is its rich, moist texture, which comes from the ice cream. It’s got the soft crumb of a traditional cake but the satisfying density of bread. If you’re in the mood for something comforting and nostalgic but don’t want to spend hours in the kitchen, this is the recipe for you.
This Vintage Ice Cream Bread is a great way to use up leftover ice cream (we all know how it goes with a half-finished tub that just won’t disappear). Whether you’re baking with kids or just looking for an easy treat, this bread will never disappoint.
Why You’ll Love This Recipe
- Easy to Make – This recipe comes together in just three simple ingredients, no special skills or fancy equipment required.
- Quick to Bake – It bakes in just under an hour, making it perfect for when you need a quick and satisfying treat.
- Deliciously Moist – The ice cream adds a rich moisture to the bread, creating a soft texture that’s absolutely irresistible.
- Customizable Flavors – You can use any flavor of ice cream, so this recipe is endlessly customizable. From classic vanilla to more adventurous options like chocolate chip cookie dough or mint chocolate chip, the possibilities are endless.
- Nostalgic Charm – It’s a throwback recipe that brings a sense of nostalgia and simplicity, reminding you of simpler times and homemade goodies.
- Minimal Cleanup – With just one bowl and a loaf pan, cleanup is a breeze. This recipe is perfect for a stress-free baking session.
Ingredients You’ll Need
Here’s the short and sweet list of ingredients for this vintage recipe:
- Ice cream – Use any flavor you love! You can choose vanilla, chocolate, strawberry, or even more unique flavors. Make sure the ice cream is softened so it blends easily with the other ingredients.
- Self-rising flour – This is the key to making the bread rise without needing yeast or baking powder. Self-rising flour is readily available in most grocery stores, or you can make your own by adding baking powder and salt to regular all-purpose flour.
- Salt – Just a pinch to bring out the sweetness of the ice cream and enhance the overall flavor.
(Note: A complete list of ingredients with exact measurements is included in the instructions section below.)
How to Make It (Step-by-Step Instructions)
Step 1: Preheat your oven
Preheat your oven to 350°F (175°C). This ensures your oven is hot and ready to bake your bread as soon as the batter is mixed.
Step 2: Soften the ice cream
Scoop the ice cream out of the container and let it sit on the counter for about 10-15 minutes to soften. This will make it easier to mix with the flour. You don’t need it to be completely melted, just soft enough to stir into a smooth consistency.
Step 3: Mix the ingredients
In a large mixing bowl, combine the softened ice cream and the self-rising flour. Stir the ingredients together until they are fully incorporated. The mixture will be thick, and that’s okay—this is the consistency you’re looking for! Add a pinch of salt to enhance the flavor.
Step 4: Pour into a loaf pan
Grease a standard 9×5-inch loaf pan with butter or cooking spray, or line it with parchment paper for easy removal. Pour the batter into the prepared pan, smoothing the top with a spatula. You can tap the pan gently on the counter to level out the batter and remove any air bubbles.
Step 5: Bake the bread
Place the loaf pan in the preheated oven and bake for 45-55 minutes, or until a toothpick or cake tester inserted into the center comes out clean. The bread should have a nice golden brown color on top, and it will feel firm to the touch when lightly pressed.
Step 6: Cool and serve
Allow the bread to cool in the pan for about 10 minutes before transferring it to a wire rack to cool completely. Once cool, slice and enjoy! You can serve it as-is or with a dusting of powdered sugar, a dollop of whipped cream, or a scoop of vanilla ice cream for a double-dose of sweet!
Helpful Tips
Choose Your Ice Cream Flavor Wisely
The flavor of the ice cream will definitely influence the taste of your bread. If you want a rich, indulgent treat, go for a flavor like chocolate, caramel swirl, or cookies and cream. If you prefer a lighter flavor, vanilla, strawberry, or even coconut will work well. The great part is that you can experiment with whatever flavors you have on hand, making this recipe versatile and fun to adapt.
Add Mix-ins for Extra Flavor
While the bread is delicious as-is, you can mix in some extra goodies to make it even more decadent. Try adding chocolate chips, chopped nuts (like pecans or walnuts), or even swirls of caramel or fudge. These extras can be folded into the batter before baking, giving your bread an extra layer of texture and flavor.
Can I Make This Gluten-Free?
Yes, you can easily adapt this recipe to be gluten-free by using a gluten-free self-rising flour blend. Many stores carry gluten-free options, or you can make your own by adding a gluten-free baking powder to a gluten-free flour mix. Just make sure to check the consistency as gluten-free flours can sometimes be a little more dense, so you may need to adjust the baking time slightly.
How to Store Leftovers
Store any leftover ice cream bread in an airtight container at room temperature for up to 3-4 days. If you have more bread than you can eat in that time, you can freeze it. Wrap the bread tightly in plastic wrap and foil, and place it in a freezer-safe bag for up to 3 months. When you’re ready to enjoy, let it thaw at room temperature for a few hours, or pop it in the microwave for a quick warm-up.
Make It Ahead of Time
This bread can be made ahead of time and stored at room temperature for a few days, making it a perfect make-ahead dessert or snack. It’s also great for potlucks, family gatherings, or as a simple treat to share with friends. You can even bake it the night before and let it cool overnight—it’ll be just as delicious the next day.
Frequently Asked Questions (FAQs)
Can I use regular flour instead of self-rising flour?
If you don’t have self-rising flour on hand, you can make your own by adding 1 ½ teaspoons of baking powder and ¼ teaspoon of salt for every cup of all-purpose flour. This will give you the same rise without the need for store-bought self-rising flour.
Can I use dairy-free ice cream?
Absolutely! You can substitute any non-dairy ice cream (such as coconut milk, almond milk, or soy-based ice cream) to make this recipe dairy-free. The bread will still bake up wonderfully, though the flavor may vary depending on the type of dairy-free ice cream you use.
What if I don’t have ice cream?
If you’re really in a pinch and don’t have ice cream, you can try substituting it with yogurt or buttermilk, but keep in mind that the texture and flavor will be different. Ice cream is what gives this bread its signature moistness and subtle sweetness.
Can I make this in a mini loaf pan?
Yes, you can make mini loaves of this bread! Just divide the batter into smaller pans and adjust the baking time. Mini loaves will likely take 25-35 minutes to bake, depending on their size, so be sure to check with a toothpick to ensure they’re done.
This Vintage Ice Cream Bread is one of those recipes that feels like a fun throwback to a simpler time, with a wonderfully rich flavor that’s both easy to make and fun to eat. It’s a perfect treat when you’re craving something sweet without all the hassle. Whether you’re baking it for yourself, sharing it with friends, or making a batch to pass along to loved ones, this bread is sure to bring smiles all around.
Give it a try and let me know how it turns out! I bet it’ll become a regular in your baking rotation, just like it has in mine. Happy baking!
Vintage Ice Cream Bread Recipe
Ingredients
- 2 cups ice cream flavor of your choice, softened
- 1 ½ cups self-rising flour
- ½ cup granulated sugar
Instructions
- Preheat the oven: Preheat your oven to 350°F (175°C). Grease or line a loaf pan with parchment paper.
- Mix the ice cream: In a large bowl, mix the softened ice cream with the sugar until well combined.
- Add the flour: Gradually add the self-rising flour to the ice cream mixture and stir until smooth.
- Pour into pan: Pour the batter into the prepared loaf pan and spread it out evenly.
- Bake: Bake for 45-50 minutes or until a toothpick inserted into the center comes out clean.
- Cool and serve: Let the bread cool in the pan for about 10 minutes, then transfer it to a wire rack to cool completely before slicing.
Notes
- You can use any flavor of ice cream—vanilla, chocolate, or fruity flavors like strawberry or peach work well.
- This bread is naturally sweet, so it’s perfect on its own, but you can also drizzle it with frosting or enjoy it with a scoop of ice cream.
- If you prefer a lighter texture, you can substitute self-rising flour with all-purpose flour and add 2 teaspoons of baking powder.