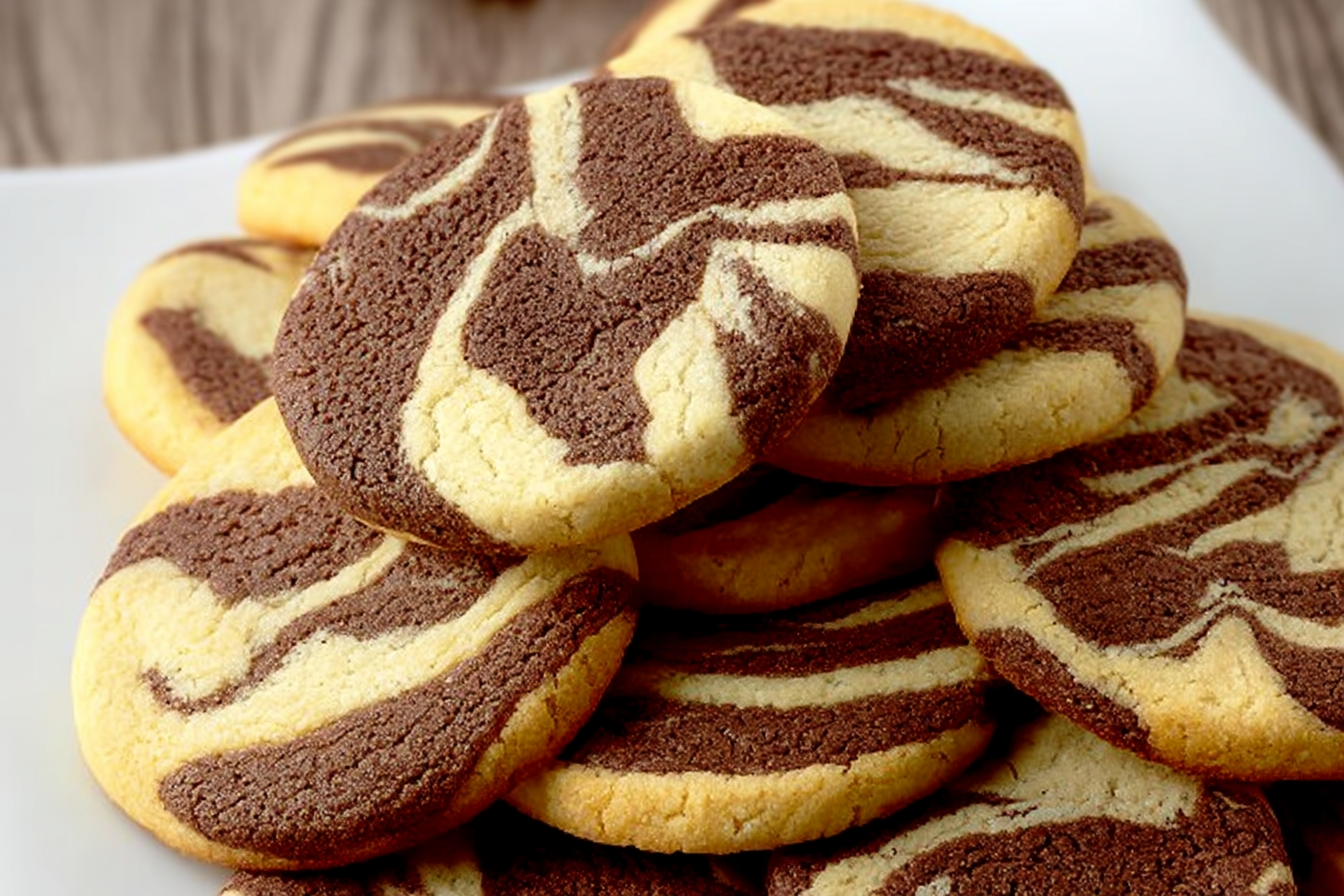
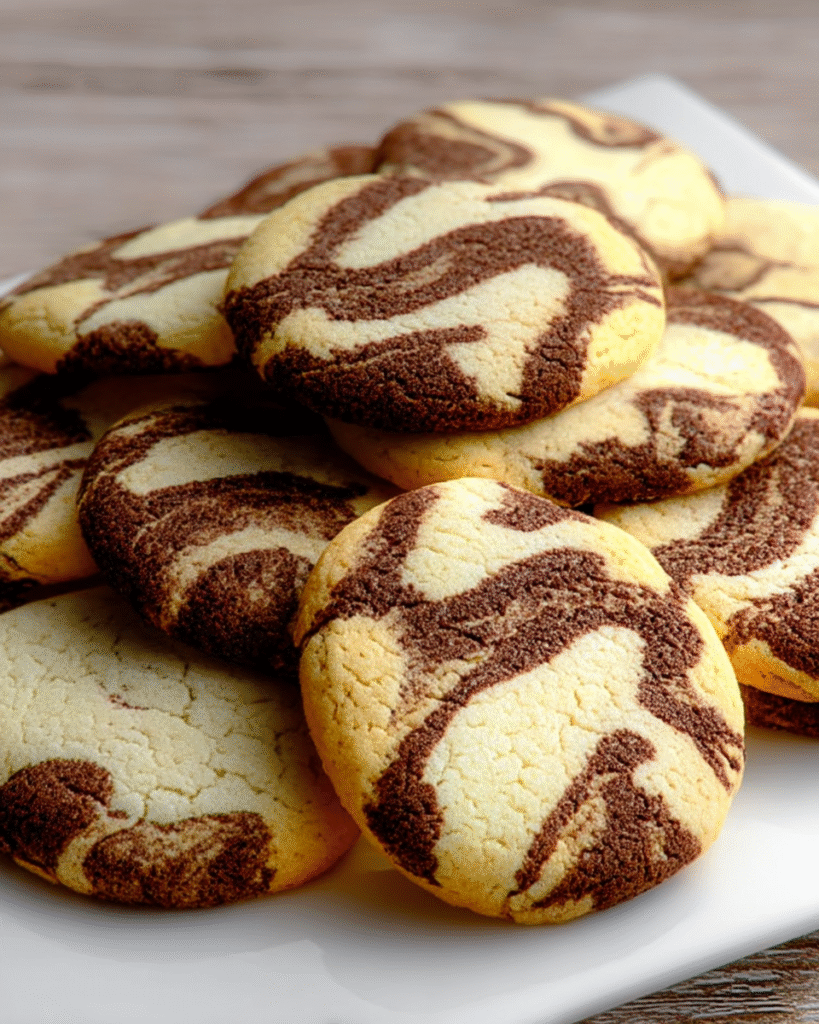
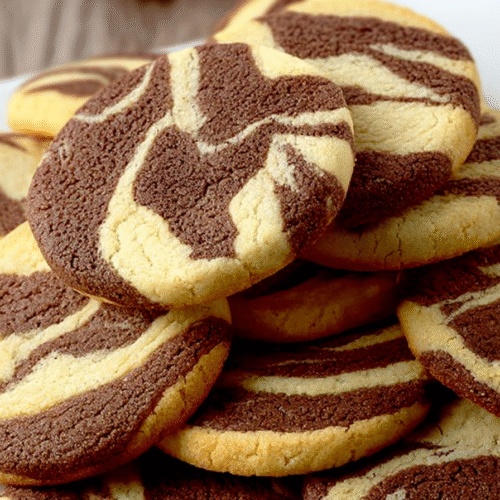
Chocolate Marble Cookies: The Best Swirled Cookie Recipe You’ll Ever Try
If you’re looking for a cookie recipe that combines rich flavors, stunning visuals, and the ultimate comfort of a chewy, buttery texture, then these Chocolate Marble Cookies are exactly what you need. Imagine a classic vanilla cookie dough swirled with deep, rich cocoa, creating a marble effect that not only looks amazing but tastes absolutely divine. With every bite, you get the perfect balance between the smooth sweetness of vanilla and the decadent, slightly bitter chocolate. What could be better?
Whether you’re an experienced baker or just starting your culinary journey, these cookies are simple to make and yield impressive results. Perfect for family gatherings, parties, or just a cozy night in, Chocolate Marble Cookies are a versatile, crowd-pleasing treat. And, if you love cookies that are both visually stunning and irresistibly delicious, this is your next go-to recipe.
In this post, I’ll guide you step-by-step through making these gorgeous cookies. You’ll learn the perfect techniques to create those beautiful swirls, along with tips for making them ahead of time, freezing them, and adjusting them to your tastes.
Why You’ll Love These Chocolate Marble Cookies
There’s a reason these Chocolate Marble Cookies are such a hit in my house—and I know you’ll love them too! Here are just a few reasons why you’ll want to bake these cookies as soon as possible:
- The Best of Both Worlds – You don’t have to pick between vanilla and chocolate when you can have both! The marble effect gives you a beautiful mix of two beloved flavors in every bite.
- Soft, Chewy Texture – The combination of butter, sugars, and eggs creates the perfect chewy center with a slightly crisp edge. The texture is spot-on, and these cookies will melt in your mouth.
- Impressive Appearance – The marbled look of these cookies will impress anyone you serve them to. Whether it’s for a special occasion or a casual treat, these cookies always look like you’ve spent hours in the kitchen—even though they’re quick and easy to make.
- Great for Meal Prep – These cookies freeze well, making them the perfect candidate for batch baking. You can make a big batch, freeze them, and bake them as needed.
- Customizable – Add chocolate chips, nuts, or even swirl in peanut butter or Nutella for extra flavor. You can play around with the recipe and make it your own!
- Fun to Make with Kids – The swirling part of the recipe is fun for kids. It’s like creating little works of art, and the kids will love helping to shape and create the marbled effect.
- Perfect for Any Occasion – These cookies are perfect for everything from a sweet afternoon snack to a dessert at a family gathering, party, or bake sale.
The Perfect Cookie Dough Base
These cookies start with a classic cookie dough recipe that’s easy to make, and the secret to getting that perfect chewy texture is in the butter-to-sugar ratio and how you cream the ingredients together. When you cream the butter and sugars properly, it helps create air pockets, giving your cookies that perfect softness.
The addition of both granulated sugar and brown sugar balances out the sweetness and provides moisture to the dough, which helps with the chewy consistency. Eggs bind the dough together and provide richness, while vanilla extract brings a hint of flavor that complements the cocoa in the marbled dough.
Ingredients You’ll Need for Chocolate Marble Cookies
Here’s what you’ll need to make these delicious cookies. Don’t be intimidated by the list—this recipe is simple and doesn’t require any special tools or ingredients!
- Unsalted Butter – 1 cup (softened to room temperature for best results)
- Granulated Sugar – 1/2 cup
- Brown Sugar – 1/2 cup (light or dark)
- Eggs – 2 large eggs
- Vanilla Extract – 1 tsp
- All-Purpose Flour – 2 1/2 cups
- Baking Soda – 1 tsp (helps the cookies rise)
- Salt – 1/2 tsp
- Unsweetened Cocoa Powder – 1/2 cup (preferably Dutch-processed for a richer flavor)
- Optional Mix-ins – Chocolate chips (milk or dark), nuts (walnuts, pecans), or white chocolate chunks for added texture and flavor.
Note: You’ll also need a baking sheet lined with parchment paper and a cookie scoop (or a tablespoon) for portioning out your dough.
(Note: A complete list of ingredients with exact measurements is included in the instructions section below.)
Step-by-Step Instructions for Chocolate Marble Cookies
Now that you have all the ingredients, let’s get to work and bake these fantastic Chocolate Marble Cookies! I promise this will become a family favorite in no time. Here’s how to do it:
Step 1: Cream the Butter and Sugars
Start by creaming the softened butter, granulated sugar, and brown sugar together. Use an electric mixer on medium speed to beat the mixture for 2-3 minutes. The goal is to achieve a light, fluffy consistency. This step is crucial for the texture of the cookies, so don’t rush it!
Step 2: Add the Eggs and Vanilla
Once the butter and sugars are creamed together, add the eggs one at a time. Mix well after each addition. Next, add the vanilla extract and beat until everything is combined. Make sure to scrape down the sides of the bowl to incorporate everything.
Step 3: Combine the Dry Ingredients
In a separate bowl, whisk together the all-purpose flour, baking soda, and salt. Slowly add this mixture to the wet ingredients, mixing just until the dough comes together. Be careful not to overmix, as this can result in tough cookies.
Step 4: Separate the Dough and Add Cocoa Powder
Once the dough is ready, divide it in half. In one half of the dough, sift in the unsweetened cocoa powder. Mix until the dough is fully incorporated and the color is even.
Step 5: Create the Marble Effect
Now comes the fun part—creating the marble effect! Take equal portions of the vanilla dough and the chocolate dough, and gently roll them into balls. Place a chocolate dough ball and a vanilla dough ball side by side on the parchment-lined baking sheet. Gently press the two balls together and twist them slightly to create that beautiful marbled look. Don’t overdo it—leave some definition between the two doughs for the best swirl effect!
Step 6: Bake the Cookies
Preheat your oven to 350°F (175°C) while you finish shaping the cookies. Place your marbled dough balls on the prepared baking sheet, making sure they’re spaced about 2 inches apart. Bake the cookies for 9-11 minutes, or until the edges are lightly golden. Don’t worry if the centers are a little soft—they’ll firm up as they cool.
Step 7: Cool and Enjoy!
Once baked, let the cookies cool on the baking sheet for 5 minutes before transferring them to a wire rack to cool completely. This helps them set properly and ensures they don’t break when you move them.
Helpful Tips for Perfect Chocolate Marble Cookies
- Chill the Dough – If your dough feels too soft to handle, chill it for 30 minutes to an hour before shaping the cookies. Chilled dough is easier to work with and will help the cookies hold their shape better while baking.
- Don’t Overmix the Dough – Overmixing the dough can make your cookies tough, so mix just until everything is incorporated.
- Try Add-Ins – These cookies are a great base for adding extras. Try tossing in some chocolate chips, chopped nuts, or even a sprinkle of sea salt on top before baking for an extra flavor boost.
- Freezer-Friendly – These cookies freeze beautifully. Roll the dough into balls and freeze them on a baking sheet for 1-2 hours. Then, transfer them to a freezer-safe bag or container. When you’re ready to bake, place the frozen dough on a baking sheet and bake at 350°F for 12-14 minutes.
Frequently Asked Questions (FAQs)
Can I make these cookies ahead of time?
Yes! You can prepare the dough in advance and refrigerate it for up to 3 days. You can also freeze the dough for up to 3 months.
How do I store leftover cookies?
Store these cookies in an airtight container at room temperature for up to 1 week. For longer storage, freeze them in a sealed container or bag.
Can I make these cookies gluten-free?
Yes! Use a 1:1 gluten-free flour blend for the best results. Keep in mind that the texture may be slightly different, but the cookies will still be delicious.
Can I add other flavors to this dough?
Absolutely! Try swirling in peanut butter, Nutella, or adding a dash of cinnamon or espresso powder for a unique twist.
These Chocolate Marble Cookies are not only delicious but also a showstopper. The swirled effect looks like you’ve put in a ton of effort, but really, it’s so simple! Whether you’re making them for a special occasion or just because you want to enjoy a sweet, chocolatey treat, they’re guaranteed to satisfy.
So go ahead, bake these cookies, and enjoy the beautiful swirls of chocolate and vanilla in every bite. Let me know how it turns out—I’d love to hear about your baking adventures with these cookies!
Chocolate Marble Cookies: The Best Swirled Cookie Recipe You’ll Ever Try
Ingredients
- 1 cup 2 sticks unsalted butter, softened
- ¾ cup granulated sugar
- ½ cup brown sugar packed
- 2 large eggs
- 2 teaspoons vanilla extract
- 2 ¼ cups all-purpose flour
- ½ teaspoon baking soda
- ½ teaspoon salt
- ⅓ cup unsweetened cocoa powder
- 1 tablespoon milk optional, for chocolate dough consistency
Instructions
- Cream the butter and sugar:
- In a large bowl, beat the softened butter, granulated sugar, and brown sugar together until light and fluffy, about 2–3 minutes.
- Add eggs and vanilla:
- Beat in the eggs one at a time, then mix in the vanilla extract until fully incorporated.
- Mix the dry ingredients:
- In a separate bowl, whisk together the flour, baking soda, and salt. Gradually add the dry ingredients to the wet mixture and mix until a soft dough forms.
- Divide and flavor the dough:
- Split the dough in half. Leave one half as is (vanilla), and mix the cocoa powder (and milk if needed) into the other half until evenly combined for the chocolate dough.
- Create the marbled effect:
- Scoop a tablespoon each of vanilla and chocolate dough. Press them together and gently swirl or roll to form a marbled ball. Repeat with remaining dough.
- Chill (optional):
- For best texture, chill the shaped dough balls in the refrigerator for 30 minutes.
- Bake the cookies:
- Preheat your oven to 350°F (175°C). Line baking sheets with parchment paper. Place the dough balls 2 inches apart and bake for 9–11 minutes, or until the edges are just set but centers still look slightly soft.
- Cool and enjoy:
- Let cookies cool on the sheet for 5 minutes before transferring to a wire rack. Enjoy warm or at room temperature!
Notes
- Want a more dramatic swirl? Gently twist the two doughs together before rolling into a ball.
- Add mini chocolate chips to either dough for extra texture.
- You can freeze the dough balls and bake directly from frozen—just add 1–2 minutes to baking time.
- These cookies keep well in an airtight container at room temp for up to 5 days.