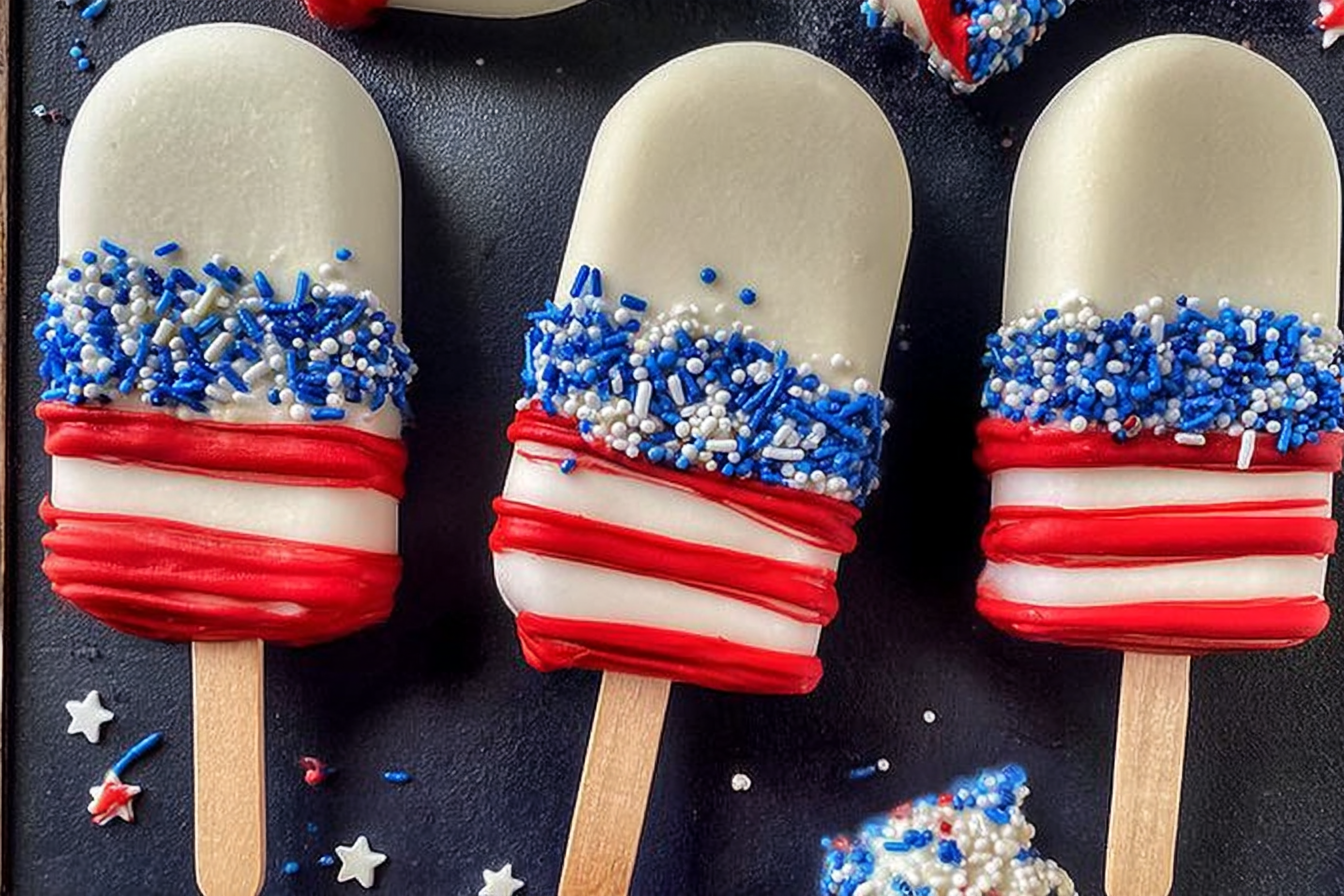
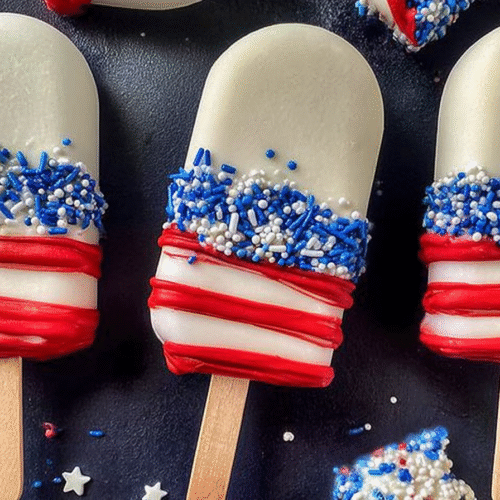
If you’re looking for a show-stopping, fun-to-make dessert that’s just as delightful to eat as it is to look at, 4th of July Cakesicles are the answer. Imagine a cake pop, but in popsicle form—bigger, easier to decorate, and even more impressive. These festive treats are dipped in red, white, and blue candy coating and decorated with sprinkles, stripes, and stars. They’re perfect for BBQs, picnics, and parties, and they’re surprisingly simple once you get the hang of it.
I started making cakesicles when I wanted something cuter than cupcakes but more durable than frosted cakes for an outdoor 4th of July celebration. The result? A dessert that both kids and adults couldn’t stop talking about. They’re easy to grab and eat, mess-free, and endlessly customizable.
Why You’ll Love This Recipe
- Fun and festive – red, white, and blue never looked (or tasted) so good
- Kid-friendly and party-ready – no forks or plates needed
- No fancy baking skills required – just mix, mold, and decorate
- Customizable – use any cake flavor and decorations you like
- Perfect make-ahead dessert – they hold up great for several days
- Easy to transport – ideal for potlucks and outdoor events
- Satisfyingly nostalgic – like a cake pop, but better

Ingredients You’ll Need
- Baked cake – from a box mix or homemade; any flavor works
- Frosting – helps bind the cake into a dough-like texture
- Candy melts or chocolate coating – red, white, and blue preferred
- Sprinkles – stars, stripes, or anything patriotic
- Cakesicle mold – silicone works best
- Popsicle sticks – wood or plastic
- Optional: Edible glitter, metallic stars, or gold leaf – for a little sparkle
(Note: A complete list of ingredients with exact measurements is included in the instructions section below.)
How to Make It (Step-by-Step Instructions)
Step 1: Bake your cake
Start with your favorite cake recipe or a box mix. Let it cool completely before moving on to the next step.
Step 2: Crumble and mix
Break the cake into fine crumbs in a large bowl. Add frosting a little at a time and mix until it resembles playdough. You want it to hold together but not be overly sticky.
Step 3: Fill the molds
Press a thin layer of melted candy coating into the walls of your cakesicle mold to form the outer shell. Let it set completely (you can refrigerate to speed this up). Then gently press your cake mixture into the mold, leaving a bit of space on top for more coating.
Step 4: Insert the stick and seal
Slide in a popsicle stick, then spoon more melted coating over the back to seal the cake inside. Smooth the surface with a spatula or the back of a spoon. Chill until completely firm.
Step 5: Unmold
Once fully set, gently peel the cakesicles out of the mold. Work slowly to avoid cracking.
Step 6: Decorate
Now for the fun part! Drizzle more colored candy melts across the tops, dip in sprinkles, or paint on stripes using a small brush. You can go bold with color or keep it clean and minimalist—it’s all up to you.
Helpful Tips
Best cake + frosting combos
Vanilla cake with cream cheese frosting is a classic base. Red velvet or funfetti are great options for a surprise pop of color inside. Chocolate cake with vanilla or peanut butter frosting? Also amazing.
Use a silicone mold
Silicone cakesicle molds are the easiest to work with and give you the cleanest results. Make sure your candy coating layer isn’t too thin or it may crack.
Make ahead
These keep well for 3–4 days stored in an airtight container in a cool spot or the refrigerator. You can also freeze them, just wrap each one individually to prevent condensation on thawing.
Re-melt gently
Candy melts can seize if overheated. Always melt in 20-30 second intervals in the microwave, stirring each time. If it gets too thick, add a tiny bit of coconut oil to smooth it out.
Creative decorating ideas
Use a piping bag to make stripes or stars, dip just half for a color-blocked effect, or add edible glitter for sparkle. Kids love helping with the sprinkles!
Display ideas
Serve upright in a decorated foam block, or lay them flat on a platter lined with parchment. Either way, they’ll be the stars of your dessert table.
Frequently Asked Questions (FAQs)
Can I use store-bought cake and frosting?
Absolutely. That’s part of what makes these so easy. You can even use leftover cake if you have it on hand.
Can I make these without a mold?
You can, but they’ll be more like large cake pops. Shape the cake mixture by hand into ovals, chill, then dip and decorate.
What kind of coating should I use?
Candy melts work best because they set quickly and don’t require tempering. You can use white chocolate, but it’s a little more finicky and melts faster in the heat.
Can I make these gluten-free or vegan?
Yes! Just use your favorite gluten-free or vegan cake and frosting recipes. Many candy melts are vegan, but always check the label.
Do they melt in the heat?
They’ll hold up for a while at room temp, but try to keep them out of direct sun. If you’re serving outdoors, keep them in a cooler until dessert time.
These 4th of July Cakesicles are always a hit—every time I make them, someone asks for the recipe or wants to try decorating their own. They’re fun to assemble, fun to decorate, and even more fun to eat. Whether you’re making a batch for your family or prepping a whole tray for a party, they’re sure to be a festive favorite. Try them this holiday and let me know how yours turn out—I’d love to see what kind of patriotic designs you come up with!
4th of July Cakesicles
Ingredients
- 1 box white cake mix plus ingredients as directed on the box
- ½ cup vegetable oil
- 1 cup water
- 3 large eggs
- Red white, and blue candy melts or chocolate wafers
- ½ cup cream cheese frosting store-bought or homemade
- Patriotic sprinkles optional
- 12 popsicle sticks or lollipop sticks
Instructions
- Prepare the cake: Preheat your oven and prepare the cake mix according to the package instructions.
- Bake the cake: Pour the batter into a greased or lined 9×13-inch baking pan. Bake as directed, then allow the cake to cool completely.
- Crumble the cake: Once cooled, crumble the cake into a large bowl until it resembles fine crumbs.
- Mix with frosting: Add the cream cheese frosting to the cake crumbs and mix until the mixture holds together when pressed.
- Shape the cakesicles: Scoop out portions of the mixture and mold them into popsicle shapes, about 2 inches long. Insert a popsicle stick into each shape.
- Chill the cakesicles: Place the shaped cakesicles on a tray lined with parchment paper and refrigerate for at least 30 minutes to firm up.
- Melt the candy melts: While the cakesicles are chilling, melt the red, white, and blue candy melts separately according to the package instructions.
- Dip the cakesicles: Once the cakesicles are firm, dip each one into the melted candy melts, coating them completely.
- Decorate: Before the coating sets, sprinkle with patriotic sprinkles if desired.
- Set the coating: Allow the decorated cakesicles to sit at room temperature until the coating hardens.
- Serve: Once set, your 4th of July cakesicles are ready to enjoy!
Notes
- Ensure the cakesicles are completely cooled before dipping to prevent the coating from melting.
- For a smoother finish, tap off any excess coating after dipping.
- Store the cakesicles in an airtight container at room temperature for up to 3 days.